How to make a simple goat cheese in Uganda:
One of the things we miss the most here is good cheese! A lot of what you find in stores (if you find any!) is rubbery and tasteless. If you do find the rare good cheese, it is very expensive. I have never made cheese before, and I was a little cautious of trying it because it sounded so complicated: rennet, cheesecloth, cheese press, waxing the cheese ... huh?
I came across this very simple recipe for goat cheese that didn't require rennet, only lemon juice: http://www.seriouseats.com/recipes/2010/02/how-to-make-goat-cheese-recipe.html I followed the recipe almost exactly except that I put in extra lemon juice, because the lemons here seem to be less... lemony.
Step 1: Find goat milk. There are goats everywhere -- everywhere! -- but if you ask anyone about goat milk they look at you funny. I looked it up, and there is a guy outside of Jinja who is one of the few dairy goat farmers in the country (probably in East Africa!) He's made a little business for himself with his herd of dairy goats, and is trying to make people aware of the benefits of goat milk. A supermarket within walking distance (sometimes) carries his company's goat yoghurt and goat milk. One day I was lucky and they actually had jugs of goat milk in the fridge!
Once you have the goat milk, the rest is easy. There's probably half a dozen ladies on my street who sell lemons, I borrowed a thermometer from a friend (couldn't find that in stores -- but if you don't have one, I wonder what would happen if you just heated up the goat milk on a gas stove for 20 minutes like I did?), and from what I hear cheesecloth can be substituted with many different materials (even read that clean handkerchiefs work). My neighbour had cheesecloth, so I borrowed his.
The final product: goat cheese! I added some garlic, salt and a bit of rosemary. I found I liked it better the next day, after I had pressed it together and left it in the fridge. It was good, but I'm still tweaking it to try to make it creamier. It was very good with spaghetti and mango salsa, but I'm still not confident enough to serve it on its own! For a first try, it was a success.
Showing posts with label food. Show all posts
Showing posts with label food. Show all posts
Tuesday, 11 February 2014
Sunday, 17 March 2013
healthy make-ahead meals

I can't believe that March Break is already over. It flew by, and I didn't get everything done that I thought I would. However, I did reach all my cooking goals (minus one dish!). Perhaps this is because cooking became a form of procrastination -- a way to avoid preparing two unit tests, writing lesson plans, making unit plans and marking the pile of assignments in my bag? Perhaps.
I love cooking ahead and freezing or preserving things. My kind of cooking involves turning my kitchen into an absolute mess, getting in comfortable clothes, working like I'm in a factory, doing several rounds of dishes and ... not having to cook again for awhile. Maybe it's my years of working in a camp kitchen, who knows? Go big or go home -- I hate the idea of pulling everything out and cooking two.servings.every.single.day.
Anyway ... I would definitely recommend this book of recipes. Everything I've made is very tasty; a nice way to switch up the same old, same old dishes I make to put in the freezer ahead of time (chili, shepherd's pie, etc.) And every single dish is definitely a step up from the frozen pizzas, pasta or cold cereal we normally reach for when we're hungry and don't have much time.
 |
| my kind of cooking: turkey casserole in my mega steel mixing bowl... |
1. Creamy Turkey Casserole with Broccoli and Cauliflower
Yummy! Surprisingly, the chopped dried prunes that this recipe calls for taste really good in it. (Never had dried prunes before.) While this recipe includes turkey, broccoli and cauliflower I wonder how "healthy" it is considering the cream of chicken soup cans, mayonnaise and Havarti cheese. Oh well -- it's delicious. Because it is pretty creamy, I think I can stretch it even further by serving it with rice or pasta.
2. Family-Friendly Chicken and Wild Rice Bake
 |
| Ginger Veggie Fried Rice |
3. Ginger and Veggie Fried Rice.
With the beaten eggs, spinach, sesame seeds and edamame (I used snow peas), this is easily hearty enough to be lunches for me. (I froze it flat in small freezer bags.)
4. Salmon Cream Cheese Breakfast Burritos
I didn't realize that this is more like a spread, so I was a little surprised when I prepared it and the texture was not what I expected! This is a really good recipe, though, and despite the cream cheese it's pretty healthy -- it takes 8 cups of baby spinach and a whole bunch of green onions. Spread this on a whole wheat wrap and you have a nice light lunch to go. Since this goes so far, I froze some of the extra in containers to use as cracker dip.

 |
| Salmon Cream Cheese spread |
 5. Black Bean Breakfast BurritosEggs, red pepper, (I threw in some green pepper too), cilantro, onions, black beans and pepper jack cheese (I used Monterey Jack -- is that the same?) ... delicious and easy breakfast or lunch. Burritos get wrapped in tin foil, put in a freezer bag, and can be quickly re-heated individually in a microwave or toaster oven.
Some other recipes in this book that caught my eye: mushroom-stuffed pork chops with roasted root vegetables, beef and papaya burritos (wha????), caramelized onion soup, smoked ham and bean soup, whole-grain parmesan herb twists and dark chocolate and almond scones.
I like how the recipes in this book make large quantities (because they're meant to be prepared and frozen ahead of time) and gave freezing and reheating instructions for each recipe.
With the smoothies, packing all of this into my small fridge freezer was quite the exercise! I can't imagine what I'd be like if I had a chest freezer ... scary. At least I'd be prepared for the Apocalypse.
 |
| turkey casserole ready to be packed into the freezer |
Thursday, 14 March 2013
make-ahead smoothies
One of my goals over March Break was to make some healthy, freeze-able food. When I'm teaching and Isaac is working and going to school, our diet quickly slides into a routine of perogies, frozen pizzas and pasta (and grill 'ems ... mmm ...)
Since I am chronically running late every morning (not being late -- running late -- there's a difference) I was inspired to make some make-ahead breakfast smoothies. My main source of inspiration (besides what I had in the freezer): http://www.theyummylife.com/Oatmeal_Smoothies
Each of the six flavours of smoothies on this site include oats and chia seeds. Oats help make the smoothies a filling meal; chia seeds are, from what I understand, really good for you and they are thickeners. So if you usually rely on ice to thicken your smoothies (like I do) and hate it when they get warm and runny, this will solve that problem.
 The author suggests to grind up a large batch of the oat/chia seed mix. Put both ingredients in the blender according to the ratios given and grind them up until you have a flour-like consistency. Then for every smoothie you want to make (a "batch" only makes one pint jar) add 1/4 cup of the oat/chia mix. (This is the same ratio she uses for her Fro-Yo pops -- haven't tried those yet.) I now have a jar of leftover oat/chia mix for the next time I make smoothies.
For each smoothie recipe I used honey as the sweetener. Because I lovelovelove honey.
 For each smoothie I used Greek yogurt because a) it's thicker b) it has more protein and I plan on these smoothies being breakfast and c) there were some 50% off containers at the grocery store.

Based on my tastes and what I had in my fridge, I chose these four flavours to try:
1. Apricot Orange Oatmeal Smoothie (3 jars -- batch doubled, stuff added)
This was my least favourite. I didn't like the tiny bits of dried apricot (to be fair, she did warn me) and the flavour was off to me. I ended up adding lots of honey and some regular yogurt because the taste was so tart. I also spilled a bit more almond extract than it called for, so that needed to be watered down with regular yogurt, too :) To be honest I would not make this recipe again.
2. Apple Peanut Butter Cinnamon Oatmeal Smoothie (2.5 jars -- batch doubled)
This. was. amazing. I doubled the batch and it gave me 2.5 jars ... excellent, because I couldn't wait to eat some. I couldn't stop "tasting" it. I was a little surprised because I'm not normally a big peanut butter fan, but this is delicious! It's also the easiest to throw together because the fruit in it is simply unsweetened apple sauce. I'm definitely going to make this one again and again -- it was my favourite.
3. Strawberry Banana Oatmeal Smoothie (3 jars -- doubled the batch)
Shocker -- this one was good, too. Pretty classic. Unfortunately my stomach doesn't like raw banana so these are for Isaac. I used two frozen bananas I had in the freezer. Last summer I also crushed some extra strawberries into a sauce and poured it into an ice cube tray, then put the cubes in a freezer bag -- I used the strawberry ice cubes and a little less liquid.
4. Pomegranate Blueberry Oatmeal Smoothie (6 jars -- multiplied the batch by five!)
I had a freezer bag of wild blackberries, so I used them up for this smoothie in place of blueberries (I don't really like blueberries, anyway). The blackberries are tart so I had to add a good amount of honey. This smoothie is good -- what you'd expect from a homemade smoothie. Good, good for you, a little bland ... The blackberries also have a zillion seeds which are a little annoying. But -- good smoothie.
Total number of jars: 14.5!
After having the jars sit in the fridge overnight, they will be stacked neatly into our freezer for breakfast next week :)
Since I am chronically running late every morning (not being late -- running late -- there's a difference) I was inspired to make some make-ahead breakfast smoothies. My main source of inspiration (besides what I had in the freezer): http://www.theyummylife.com/Oatmeal_Smoothies
Each of the six flavours of smoothies on this site include oats and chia seeds. Oats help make the smoothies a filling meal; chia seeds are, from what I understand, really good for you and they are thickeners. So if you usually rely on ice to thicken your smoothies (like I do) and hate it when they get warm and runny, this will solve that problem.
 The author suggests to grind up a large batch of the oat/chia seed mix. Put both ingredients in the blender according to the ratios given and grind them up until you have a flour-like consistency. Then for every smoothie you want to make (a "batch" only makes one pint jar) add 1/4 cup of the oat/chia mix. (This is the same ratio she uses for her Fro-Yo pops -- haven't tried those yet.) I now have a jar of leftover oat/chia mix for the next time I make smoothies.
For each smoothie recipe I used honey as the sweetener. Because I lovelovelove honey.
 For each smoothie I used Greek yogurt because a) it's thicker b) it has more protein and I plan on these smoothies being breakfast and c) there were some 50% off containers at the grocery store.
Based on my tastes and what I had in my fridge, I chose these four flavours to try:
1. Apricot Orange Oatmeal Smoothie (3 jars -- batch doubled, stuff added)
This was my least favourite. I didn't like the tiny bits of dried apricot (to be fair, she did warn me) and the flavour was off to me. I ended up adding lots of honey and some regular yogurt because the taste was so tart. I also spilled a bit more almond extract than it called for, so that needed to be watered down with regular yogurt, too :) To be honest I would not make this recipe again.
2. Apple Peanut Butter Cinnamon Oatmeal Smoothie (2.5 jars -- batch doubled)
This. was. amazing. I doubled the batch and it gave me 2.5 jars ... excellent, because I couldn't wait to eat some. I couldn't stop "tasting" it. I was a little surprised because I'm not normally a big peanut butter fan, but this is delicious! It's also the easiest to throw together because the fruit in it is simply unsweetened apple sauce. I'm definitely going to make this one again and again -- it was my favourite.
3. Strawberry Banana Oatmeal Smoothie (3 jars -- doubled the batch)
Shocker -- this one was good, too. Pretty classic. Unfortunately my stomach doesn't like raw banana so these are for Isaac. I used two frozen bananas I had in the freezer. Last summer I also crushed some extra strawberries into a sauce and poured it into an ice cube tray, then put the cubes in a freezer bag -- I used the strawberry ice cubes and a little less liquid.
4. Pomegranate Blueberry Oatmeal Smoothie (6 jars -- multiplied the batch by five!)
I had a freezer bag of wild blackberries, so I used them up for this smoothie in place of blueberries (I don't really like blueberries, anyway). The blackberries are tart so I had to add a good amount of honey. This smoothie is good -- what you'd expect from a homemade smoothie. Good, good for you, a little bland ... The blackberries also have a zillion seeds which are a little annoying. But -- good smoothie.
Total number of jars: 14.5!
After having the jars sit in the fridge overnight, they will be stacked neatly into our freezer for breakfast next week :)
 |
| Top left: apricot orange, Top right and bottom right: strawberry banana Bottom left: blackberry pomegranate, Bottom centre: apple peanut butter cinnamon |
Thursday, 7 March 2013
spaghetti squash round one
 I don't remember ever eating spaghetti squash, and I have certainly never cooked it. My cooperating teacher is a bodybuilder and a self-proclaimed nutrition nut. She's been an inspiration for me (I've actually been exercising three times a week since New Year's!) and she suggested spaghetti squash as an alternative to pasta. I love squash, and I love spaghetti, so I thought this might work out well.
  I prepared the squash by slicing it in half (they're tough to cut into -- be careful!) lengthwise. I scooped out the seeds and loose strands and put both halves on a cookie sheet, skin-side down. I brushed about 1 and a half tablespoons of olive oil on each side and sprinkled with salt and pepper. I covered both halves with tin foil and put them in the oven at 375 (or was it 400?) degrees.
When I checked on the squash about 25 minutes in, I was still at a loss as to how exactly this solid squash would turn into noodle-like strands. But when I took the squash out of the oven after about 50 minutes of baking time, I was amazed! I started pushing my fork into the flesh, peeling it away from the skin and sure enough it began to separate like spaghetti noodles!
 I took the "alternative to spaghetti" quite literally, so I only added a bit of brie cheese that we had in the fridge, the last sprinkling of parmesan, and a few tablespoons of pasta sauce. I was a little disappointed by how it became a mushy mass, and Isaac didn't appreciate the texture at all. I did enjoy how the squash gave me that full feeling you get from pasta (without being pasta!). I need to approach spaghetti squash on its own terms next time instead of just seasoning it as if it was spaghetti. Some teachers at the high school suggested feta and herbs ...
Even though spagetti squash was a no-go for Isaac, I liked it and will definitely try it again.
Wednesday, 13 February 2013
apple sweet potato pork chops
I had a sweet potato, two pork chops, and a bunch of apples that were going to go bad. I went online to look up a recipe for apple pork chops. I found a recipe with sweet potato as well and tweaked it. It's soooo easy and delicious! Isaac -- a man of few words -- complimented it a few times.
- Put 2 pork chops in a Corningware dish
- Sprinkle the chops with salt and pepper to taste
- Peel, core and slice one apple -- place the pieces over the pork chops
- Add a layer of sliced onion (one onion)
- Peel and slice the sweet potato and layer it on top
- Sprinkle with salt and pepper
- Sprinkle with about 2-3 tablespoons of brown sugar
- Bake at 375 degrees for about 1 hour
Tip: Remember to slice apples thicker (because they cook faster and could turn to complete mush) and slice the onion and sweet potato (especially the sweet potato!) thinner so that it will cook within the hour.
I prepared this the day before and kept it in the fridge so I could just throw it in the oven the next day. It turned out moist and juicy -- Isaac thought I had made a maple syrup sauce.
I love dishes that 1) I can prepare ahead of time, 2) are one-dish meals and 3) I can layer and not measure exactly :)
Monday, 7 January 2013
new soup
 I am a soup fiend. I love making and eating good soup. As winter fully buries us, I am bummed that my immersion blender is broken (what did I expect? I got it for $3 at a garage sale!) and am on the lookout for a new one.
Isaac and I are both so busy right now -- he's holding down two part time jobs and is a full-time student, while I'm student teaching full-time and working part-time. I hate it when we're both busy and we end up eating junk, so on Sunday I went to the Halifax Farmer's Market and purchased two frozen homemade soups.
We had the seafood chowder last night, and today I am trying the other flavour: beet parsnip pear soup! A different combo to be sure, but the vendor told me that it's one of her most popular soups -- people come back for it week after week.
Now I'm sitting here eating the beet-parsnip-pear concoction, and it's good! I'm going to have to find a recipe, because I'm curious to try to make it myself. It probably wouldn't be soup that I'd make often, but it's a different flavour to have once in awhile.
Some of my other favourite soups to make/freeze/eat:
- Carrot ginger soup (sooo cheap to make!)
- Butternut squash soup
- Cream of broccoli with cheddar
- Good old chicken or turkey noodle soup
- Chili
I pinned a recipe on Pinterest for a cauliflower soup, and I also need to try to make borscht ... maybe the same day I attempt beet parsnip pear soup :)
Thursday, 3 January 2013
winter wonderland bridal shower: pinterest-style
I discovered Pinterest. I'm a little behind, I realize, but when I saw how addicted other people became I was a little wary of jumping in. I thought my sister Sonja's Winter Wonderland themed bridal shower would be a good excuse to introduce myself to Pinterest.
I am now hooked on Pinterest. I have quote boards, recipe boards, DIY boards, teaching boards, etc.
Sonja's shower was a success, and a I have to admit that most of the creative details we stole from Pinterest :) My oldest sister Kristel, the fashionista fresh from California, was the one who had the idea to have a Winter Wonderland theme. In the process of organizing (controlling?) and home-for-Christmas-busyness I only had one meltdown: I threw myself on my bed and sobbed like a baby when I saw that my younger sister had taken the liberty of setting up my note tree. My husband, poor man who grew up with mostly brothers, tried to rub my back while I blubbered at him to "leave me alone!" It was a pretty embarrassing relapse back to age eleven, but I figure that one meltdown over the whole Christmas season is okay! :)
Some Pinterest-inspired highlights:

- Mason jars + Epsom salts + tea lights = cheap, wintry candles
 - Tissue paper balls from Pinterest! So easy! All I used was eight sheets of tissue paper (for each ball), gift ribbon, scissors and a bit of tape. All you do is fold the stack of tissue paper accordian-style (1-1 and a half inch), tie the middle with ribbon (leave some length to hang the tissue paper ball by), secure the ribbon with a bit of tape, cut the edges sharply or curved (I did a mix), and then separate layer by layer. They're light, cheap, and they don't droop after a few days like balloons! :) Find the full tutorial on my Pinterest board under Special Occassions! My mother, who would be the first one to tell you that she is not crafty, successfully made several of these into a beautiful piece to hang in the kitchen.


- A hot chocolate bar. The women and the kids in attendance loved this! I borrowed a perk from my super-hostess mother-in-law and filled jars with different toppings from the Bulk Barn. We got Skor bits, marshmallows, candy canes, chocolate sprinkles, cookie straws, blue sprinkles and whipped cream for toppings.
- Cake pops! These turned out really well. I was so focused on how they looked that I began to worry about how they would taste -- but they were delicious! I used two double chocolate cake mixes. I baked the cakes and after they cooled I crumbled them finely in a bowl, one at a time. Because the cake mixes were so moist, I only used about two heaping tablespoons of icing (pre-made) for each cake mix. This was enough to roll the mix into balls. I then dipped the cake pop sticks into melted white chocolate and stuck them into the balls (so that the melted chocolate would hold the cake onto the sticks). I stuck these in the freezer for 15-20 minutes. Then I took them out and dipped each cake pop into the melted white chocolate (with a touch of lard added) and sprinkled them with blue sparkles. I didn't think ahead enough to have something for the pops to stand in while they hardened, so I had to do a few at a time and balance them in mason jars so they wouldn't touch each other while they hardened. Even though the chocolate hardened quickly, I got impatient with this process so for the second batch I simple dipped them in white chocolate, stuck them upside-down in some pretty mini-cupcake liners, and sprinkled with the blue sugar. By the time I finished both cake mixes I got about 60 pops.
- A note tree. In each wintry invitation, guests recieved two recipe cards. One card was for them to write down their favourite recipe for the bride-to-be, and the other was to write down a piece of advice, a favourite Scripture, or a good quote. To display the pieces of advice/Scripture/quotes we set up a little note tree using a branch I had taken from the side of the road. My younger sister sprayed it with fake snow, which looked very good, I must say! We had extra pens and pieces of paper set out, as well as a jar of pre-cut ribbon. It was a really great way for people to share some wisdom with my sister as well as the other guests.

- This last idea was not from Pinterest. Using my mother's childhood wagon, we set up a wintry display. White lights under tissue paper, skates, snowflakes, jars of pine cones and a little Christmas tree ended up on the wagon. My mom was so pleased with it because the wagon had special sentimental value for her.
- This idea was also not from Pinterest: a gift toboggan! Using a toboggan for the gifts was a fun way to incorporate the Winter Wonderland theme.
Kudos to my mom and sisters on throwing a beautiful shower, thanks to all the generous guests who made the effort to come to a shower only days before Christmas, and congratulations to Sonja! Oh, and thanks to all the people out there who freely share ideas on Pinterest!
I am now hooked on Pinterest. I have quote boards, recipe boards, DIY boards, teaching boards, etc.
Sonja's shower was a success, and a I have to admit that most of the creative details we stole from Pinterest :) My oldest sister Kristel, the fashionista fresh from California, was the one who had the idea to have a Winter Wonderland theme. In the process of organizing (controlling?) and home-for-Christmas-busyness I only had one meltdown: I threw myself on my bed and sobbed like a baby when I saw that my younger sister had taken the liberty of setting up my note tree. My husband, poor man who grew up with mostly brothers, tried to rub my back while I blubbered at him to "leave me alone!" It was a pretty embarrassing relapse back to age eleven, but I figure that one meltdown over the whole Christmas season is okay! :)
Some Pinterest-inspired highlights:

- Mason jars + Epsom salts + tea lights = cheap, wintry candles
 - Tissue paper balls from Pinterest! So easy! All I used was eight sheets of tissue paper (for each ball), gift ribbon, scissors and a bit of tape. All you do is fold the stack of tissue paper accordian-style (1-1 and a half inch), tie the middle with ribbon (leave some length to hang the tissue paper ball by), secure the ribbon with a bit of tape, cut the edges sharply or curved (I did a mix), and then separate layer by layer. They're light, cheap, and they don't droop after a few days like balloons! :) Find the full tutorial on my Pinterest board under Special Occassions! My mother, who would be the first one to tell you that she is not crafty, successfully made several of these into a beautiful piece to hang in the kitchen.

- A hot chocolate bar. The women and the kids in attendance loved this! I borrowed a perk from my super-hostess mother-in-law and filled jars with different toppings from the Bulk Barn. We got Skor bits, marshmallows, candy canes, chocolate sprinkles, cookie straws, blue sprinkles and whipped cream for toppings.
 |
| cake pops |
 |
| the note tree |
- A note tree. In each wintry invitation, guests recieved two recipe cards. One card was for them to write down their favourite recipe for the bride-to-be, and the other was to write down a piece of advice, a favourite Scripture, or a good quote. To display the pieces of advice/Scripture/quotes we set up a little note tree using a branch I had taken from the side of the road. My younger sister sprayed it with fake snow, which looked very good, I must say! We had extra pens and pieces of paper set out, as well as a jar of pre-cut ribbon. It was a really great way for people to share some wisdom with my sister as well as the other guests.

- This last idea was not from Pinterest. Using my mother's childhood wagon, we set up a wintry display. White lights under tissue paper, skates, snowflakes, jars of pine cones and a little Christmas tree ended up on the wagon. My mom was so pleased with it because the wagon had special sentimental value for her.
 |
| gift toboggan |
- This idea was also not from Pinterest: a gift toboggan! Using a toboggan for the gifts was a fun way to incorporate the Winter Wonderland theme.
 |
| had to include a picture of mom's chocolate-covered strawberries! |
Tuesday, 4 December 2012
Canning 2012
This was our first year making our own preserves. Isaac and I are both students with many siblings. As an affordable gift that will hopefully still be appreciated, we decided to give preserves for Christmas this year.
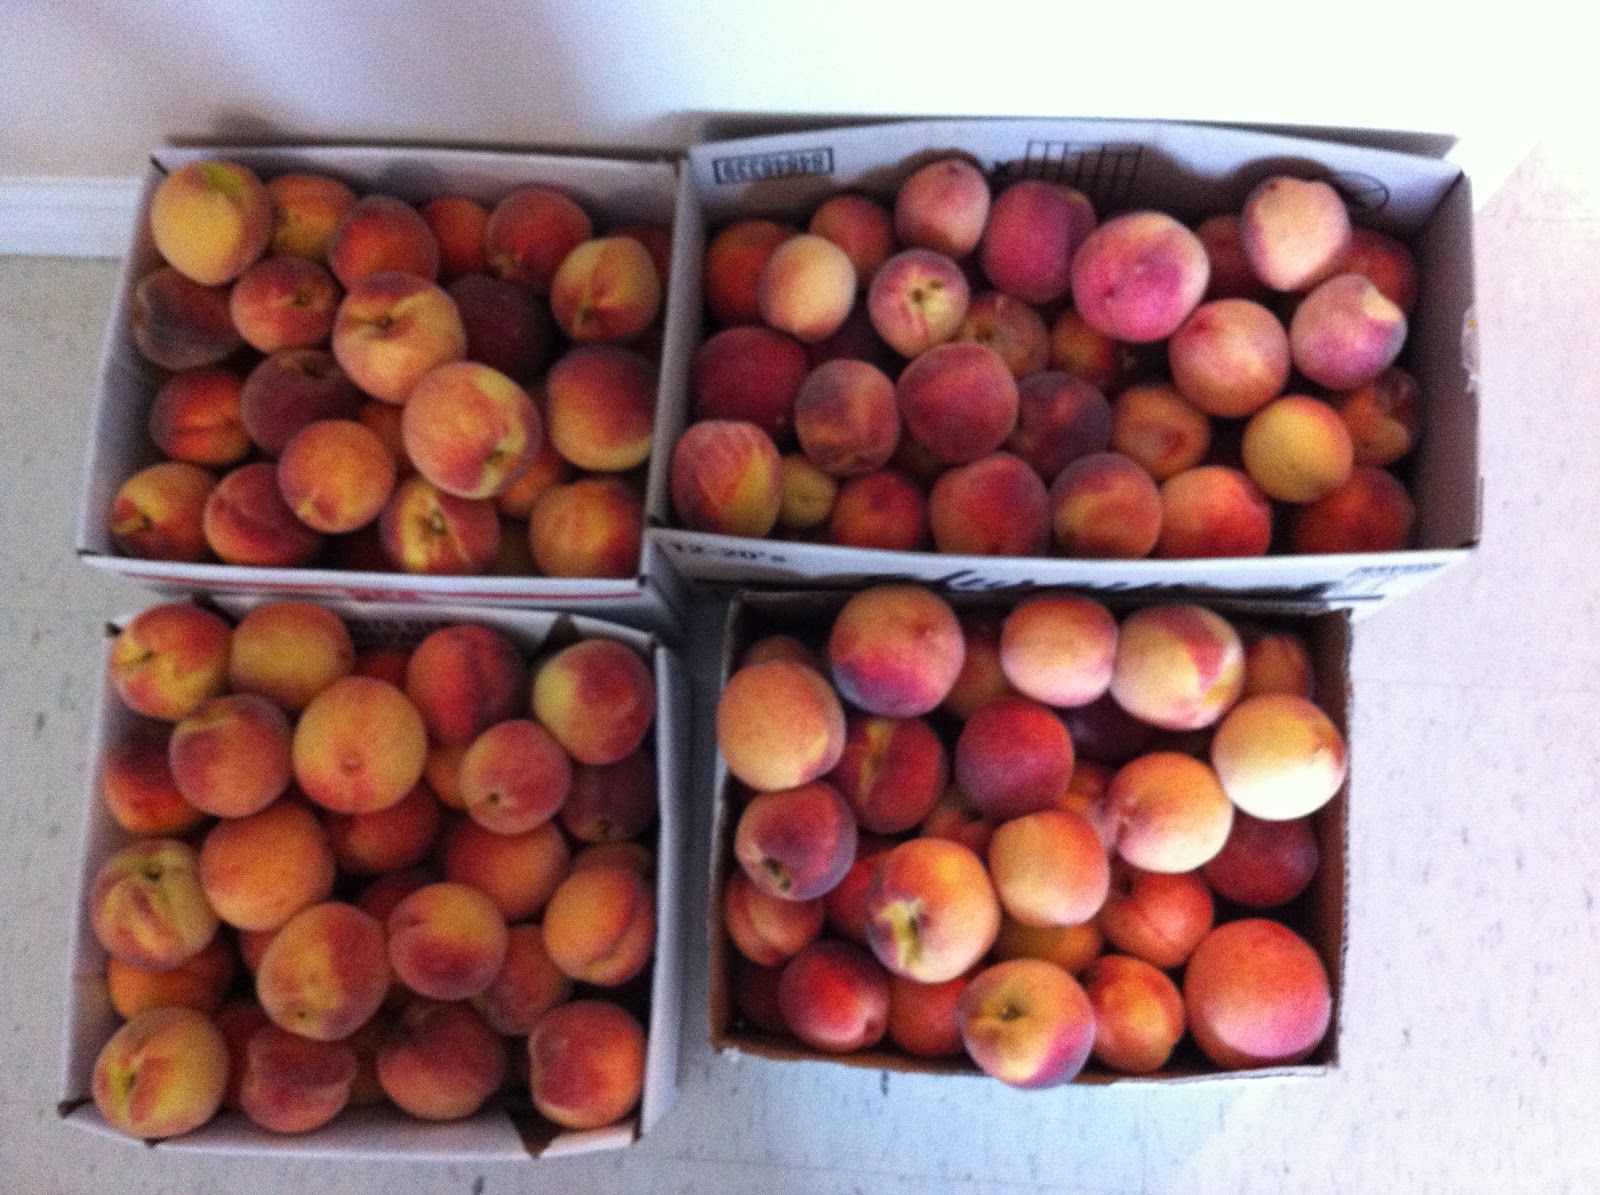
 We spent summer and fall driving to u-picks in the Annapolis Valley, hunting down deals at farmer's markets, picking peaches from a friend's backyard, and hiking to pick wild blackberries, raspberries, and cranberries. We spent hours of quality time together pitting, peeling and processing. The result: a full, beautiful pantry of our own preserves.
We had a few bumps along the way, of course. Since our first batch of jam turned out a little runny, I decided to err on the side of caution on the next batch. I managed to burn a pot of raspberry jam. I realized something was wrong when I poured the jam into a jar and, as it cooled, it transformed into a candy-like consistency. I couldn't even save the jar -- it had to be thrown away! Now I see why the recipes insist on small batches ... at least I didn't waste all our berries!
Ever-frugal, I kept track of all of our canning costs. The results:
Start-up costs/re-usable:
This includes a funnel, a ladle, a hot water bath canner, a jar lifter, and lots of jars (from thrift stores, garage sales, etc)
Total: $53.87
 Costs for 2012:
This includes jars that will be used for gifts (I got 48 pretty little jars with one-piece lids for $20 off Kijiji!), ingredients for the jam (pectin, lemon juice, berries, etc), and jar lids that cannot be re-used. (Please note: I kept a detailed list of all costs, include a 14 cent jalepano pepper!)
Total: $202.45
Total of Start-Up and Consumed Costs: $256.32
Types of Preserves Made:
Raspberry jam
Strawberry jam (used a recipe with less sugar -- even though it made less jam, the jam was a beautiful ruby red and bursting with berry flavour!)
Blackberry-Raspberry jam
Peach jelly (made from the peach juice strained from peach pits and peelings -- love being frugal!)
Apple Almond Earl Grey jelly (delicious, delicate flavour!)
Marmalade
Cranberry sauce
Strawberry sauce
Spiced Blackberry sauce (aka runny Spiced Blackberry jam!)
German cabbage (red cabbage with seasonings -- these didn't turn out so well, the spices were too strong)
Spiced Blackberry jam (although the recipe with nutmeg was yummy, the spices were a bit overpowering)
Canned peaches
Canned pears
Red pepper jelly (sooo yummy! We go through this very quickly! The recipe is easy, fun to make, and I prefer mine on the sweet side! It's very nice on sandwiches and on crackers with goat cheese!)
Tomato sauce (I have to admit I was a little disappointed at how much 10lbs of field tomatoes boils down! But the sauce was delicious)

Jars Made
250 mL jars: 20
190 mL jars: 20
pints: 27
quarts: 20
1/2 pint: 7
plus about two ice cube trays of frozen strawberry sauce (to be put in a freezer bag for smoothies!)
Total number of jars: 94
Including start-up costs, each jar only cost me an average of: $2.73
Not including start-up costs (which will be re-used year after year), each jar only cost an average of: $2.15
Even for my first year of canning, I must say that's a pretty good deal! Especially considering the number of gift jars I have (40). Even if I give each person 3-4 jars in a little basket (baskets from Value Village), each gift still comes in at under $10.
 There's nothing quite as beautiful as the sight of a pantry full of different coloured, different shaped jars... I'm pretty proud of what we accomplished this year!
 We spent summer and fall driving to u-picks in the Annapolis Valley, hunting down deals at farmer's markets, picking peaches from a friend's backyard, and hiking to pick wild blackberries, raspberries, and cranberries. We spent hours of quality time together pitting, peeling and processing. The result: a full, beautiful pantry of our own preserves.
 We had a few bumps along the way, of course. Since our first batch of jam turned out a little runny, I decided to err on the side of caution on the next batch. I managed to burn a pot of raspberry jam. I realized something was wrong when I poured the jam into a jar and, as it cooled, it transformed into a candy-like consistency. I couldn't even save the jar -- it had to be thrown away! Now I see why the recipes insist on small batches ... at least I didn't waste all our berries!
Ever-frugal, I kept track of all of our canning costs. The results:
Start-up costs/re-usable:
This includes a funnel, a ladle, a hot water bath canner, a jar lifter, and lots of jars (from thrift stores, garage sales, etc)
Total: $53.87
 Costs for 2012:
 This includes jars that will be used for gifts (I got 48 pretty little jars with one-piece lids for $20 off Kijiji!), ingredients for the jam (pectin, lemon juice, berries, etc), and jar lids that cannot be re-used. (Please note: I kept a detailed list of all costs, include a 14 cent jalepano pepper!)
Total: $202.45
Total of Start-Up and Consumed Costs: $256.32
Types of Preserves Made:
Raspberry jam
Strawberry jam (used a recipe with less sugar -- even though it made less jam, the jam was a beautiful ruby red and bursting with berry flavour!)
Blackberry-Raspberry jam
Peach jelly (made from the peach juice strained from peach pits and peelings -- love being frugal!)
Apple Almond Earl Grey jelly (delicious, delicate flavour!)
Marmalade
Cranberry sauce
Strawberry sauce
Spiced Blackberry sauce (aka runny Spiced Blackberry jam!)
German cabbage (red cabbage with seasonings -- these didn't turn out so well, the spices were too strong)
Spiced Blackberry jam (although the recipe with nutmeg was yummy, the spices were a bit overpowering)
Canned peaches
Canned pears
Red pepper jelly (sooo yummy! We go through this very quickly! The recipe is easy, fun to make, and I prefer mine on the sweet side! It's very nice on sandwiches and on crackers with goat cheese!)
Tomato sauce (I have to admit I was a little disappointed at how much 10lbs of field tomatoes boils down! But the sauce was delicious)

Jars Made
250 mL jars: 20
190 mL jars: 20
pints: 27
quarts: 20
1/2 pint: 7
plus about two ice cube trays of frozen strawberry sauce (to be put in a freezer bag for smoothies!)
Total number of jars: 94
Including start-up costs, each jar only cost me an average of: $2.73
Not including start-up costs (which will be re-used year after year), each jar only cost an average of: $2.15
Even for my first year of canning, I must say that's a pretty good deal! Especially considering the number of gift jars I have (40). Even if I give each person 3-4 jars in a little basket (baskets from Value Village), each gift still comes in at under $10.

Subscribe to:
Posts (Atom)