How to make a simple goat cheese in Uganda:
One of the things we miss the most here is good cheese! A lot of what you find in stores (if you find any!) is rubbery and tasteless. If you do find the rare good cheese, it is very expensive. I have never made cheese before, and I was a little cautious of trying it because it sounded so complicated: rennet, cheesecloth, cheese press, waxing the cheese ... huh?
I came across this very simple recipe for goat cheese that didn't require rennet, only lemon juice: http://www.seriouseats.com/recipes/2010/02/how-to-make-goat-cheese-recipe.html I followed the recipe almost exactly except that I put in extra lemon juice, because the lemons here seem to be less... lemony.
Step 1: Find goat milk. There are goats everywhere -- everywhere! -- but if you ask anyone about goat milk they look at you funny. I looked it up, and there is a guy outside of Jinja who is one of the few dairy goat farmers in the country (probably in East Africa!) He's made a little business for himself with his herd of dairy goats, and is trying to make people aware of the benefits of goat milk. A supermarket within walking distance (sometimes) carries his company's goat yoghurt and goat milk. One day I was lucky and they actually had jugs of goat milk in the fridge!
Once you have the goat milk, the rest is easy. There's probably half a dozen ladies on my street who sell lemons, I borrowed a thermometer from a friend (couldn't find that in stores -- but if you don't have one, I wonder what would happen if you just heated up the goat milk on a gas stove for 20 minutes like I did?), and from what I hear cheesecloth can be substituted with many different materials (even read that clean handkerchiefs work). My neighbour had cheesecloth, so I borrowed his.
The final product: goat cheese! I added some garlic, salt and a bit of rosemary. I found I liked it better the next day, after I had pressed it together and left it in the fridge. It was good, but I'm still tweaking it to try to make it creamier. It was very good with spaghetti and mango salsa, but I'm still not confident enough to serve it on its own! For a first try, it was a success.
Showing posts with label being frugal. Show all posts
Showing posts with label being frugal. Show all posts
Tuesday, 11 February 2014

Thursday, 17 October 2013
trip to sipi falls
This week is October Break! Wahoo! A week long break from the daily grind.
Even though marking and planning are going to happen over this break, Isaac and I wanted to start the break off with a little getaway. Now that we've settled into our home in Kansanga we've been itching to get out of the city and explore a little.
Now, as a missionary teacher and a full-time student our options are limited by a tight budget. So ... rustic it is!
We decided to go to Sipi Falls, which is just outside of (or just inside of?) Mt. Elgon National Park, which straddles the border between Uganda and Kenya. Two other families from the school decided to go as well.
A few points about our trip in case you, like me, are in Uganda, looking for a cheap getaway, and are having trouble finding accurate information:
Even though marking and planning are going to happen over this break, Isaac and I wanted to start the break off with a little getaway. Now that we've settled into our home in Kansanga we've been itching to get out of the city and explore a little.
Now, as a missionary teacher and a full-time student our options are limited by a tight budget. So ... rustic it is!
We decided to go to Sipi Falls, which is just outside of (or just inside of?) Mt. Elgon National Park, which straddles the border between Uganda and Kenya. Two other families from the school decided to go as well.
A few points about our trip in case you, like me, are in Uganda, looking for a cheap getaway, and are having trouble finding accurate information:
- We were told that the trip to Sipi Falls from Kansanga would be 4 to 5 hours. The way there took us 7. We rented an entire matatu (van taxis) for the price of 300,000 shillings. The driver tried to drop us off in Mbale, saying that was the destination agreed upon, but we told him that if he would not be faithful to the agreement we would not pay him the full amount. He begrudgingly agreed and took us to Sipi Falls, after getting lost for over half an hour. The way home from Sipi Falls involved getting a matatu to Mbale (10,000shillings/person) and then a matatu from Mbale to Kansanga (about 240,000). The matatu that picked us from Sipi Falls could not take us directly to Kampala because it wasn't registered to drive that route. The way home took us about 5 or 6 hours.
- There is a stop along the way where the matatu pulls to the side and you are swarmed by roadside vendors. African fast food! We got dinner on the way home this way, buying chicken on a stick, cold drinks and chipattes for only a few dollars.
- We stayed at the Crow's Nest. It costs 20,000 shillings ($8) per person per night, and this includes tea, coffee and a banana in the morning. It is rustic (bring your own toilet paper to the latrine, just in case) but fairly clean. Mosquito nets, sheets, pillows (either lumpy or hard as a rock), and blankets are provided. The view is spectacular -- you can see all three waterfalls from your room! There is, surprisingly, hot water that runs from a tank heated by a fire at the top of the hill down to the shower hut. It takes a few minutes to get the hot water flowing, so once it starts if you have a group make sure they shower right after one another.
- Staying at The Crow's Nest seems to make the hike to the falls much farther. There are other options, such as Lacam Lodge and Sipi River Resort that you can look into. We stopped at one of the lodges to use the washrooms and it is definitely a more luxurious option than the Crow's Nest.
- One thing we didn't expect: bring a sweater! Although the sun was hot in the morning, it became quite cool in the evenings.
- Take the time to walk up to the look out looking over the Rift Valley (on The Crow's Nest property, with only a wooden sign saying "Viewpoint" pointing it out). Be warned that some local young men will try to tell you that you need to pay, because you've crossed onto their land. Tell them that your guide at The Crow's Nest told you that you didn't need to pay, and that they should take the issue up with them.
- We did two guided tours: the hike of the falls (with our group, it took over 4 hours) and the next day we did the coffee making tour (very interesting!) Our guide, George, was from one of the local villages with years of experience in tourism. He was very knowledgeable, sincere, and easy to understand. Each tour is 25,000 ($10) per person, but because we did two we negotiated it down to 20,000 per person (40,000 for both tours). He also didn't make us pay for the children.
- Children: the kids that came with us were troopers. They are exceptional kids, and even the guide was impressed. However, the coffee tour was a lot more walking than we originally thought and by the end of that (the second day) the kids were starting to reach their limit and there were some meltdowns. Also, the ride to Sipi Falls and back (from Kampala) is another thing to consider if you have a family.
- Meals at the Crow's Nest: we brought enough food and snacks so that we only had to purchase dinner. Even though the meals are listed individually on the menu, they come in family-style dishes. This was fun, because you got to try a little bit of everything. Ordering one meal per person was WAY too much food and we could not finish it. The next night, when we ordered only 8 meals (instead of 11), we found we got the same amounts of rice, spaghetti, matooke, etc. so once again we were unable to finish it all.
- One the hike of Sipi Falls, you are able to swim (the water is frigid, but said to be parasite free) so bring swim shorts if you wish. We had a doctor with us, and he swam, so I figure it can't be that bad!
- The people in the region speak local dialects but, as you are close to Kenya, they also speak Swahili. So if you know a few phrases you will certainly meet people along the hikes that you can say hello to!
 |
| Isaac in the doorway of our room. |
All in all, the scenery was spectacular, the hiking was a little rugged (bring good shoes and beware of slippery rocks!), and the accommodations were rustic but hospitable.
And the grand total for my husband and I to go on a two-night getaway (transportation, accommodations, and food included) came in at a little under 300,000 shillings ($120). Not bad, not bad ...
 |
| Our view! |
 |
| Our guide and host, George |
 |
| Me on the hike. |
 |
| Latrine and shower house. |
 |
| Coffee! |
 |
| George winnowing the coffee beans taken from his garden (his home is in the background) |
Tuesday, 16 April 2013
swap till you drop
 A few weeks ago I hosted (and attended) my very first clothing swap party. I needed to trim down my closet in preparation for our move to Uganda, so the idea of a clothing swap sounded genius. Our apartment is a little on the small side (and a little on the haphazardly-being-dismantled side) so my friend Lindsay agreed to have it at her place. Her poor husband was informed that he would have to vacate the premises for the evening of April 6 and we set about planning.
Some notes on how I hosted a clothing swap party:
1. I sent out the invitations as far in advance as I could (about a month) to give people plenty of notice to look through their closets. I just sent a Facebook invitation, so as the party drew closer I could remind people about it. I read that 10 -15 is a good number for a swap. We ended up having only eight girls (plus one who couldn't

 2. My guidelines: everyone had to bring a minimum of five items. These could be pieces of clothing, jewelry or accessories. Stains and broken zippers were to be left at home, along with any used bathing suits or undergarments :) Bringing some items with flexible sizing was encouraged.
3. We decided to make the party especially feminine, so I made a pretty strawberry angel food cake trifle (mostly just so I could use the trifle dish I got as a wedding gift) and brought out my teacups.
 4. Since we had just purchased plenty of bins for our move, I used them to organize the clothes. I made labels using scrapbooking paper and organized the bins according to short-sleeve and sleeveless tops, long-sleeve tops, bottoms and accessories. I used a clothes drying rack and the curtain road to drape jackets and hang dresses. We got a lot of short-sleeve and sleeveless tops, so we ended up separating them into two different bins.
 |
| Our own little Frenchy's! |
 |
| Embellish jewelry by Cait |
7. After picking our favourites and spending our tickets, it was a free for all! Some people could stock up their wardrobes, while others wanted to downsize their closets and only pick up a few new things. It was really fun to try stuff on together and get each other's opinions on different pieces. Surprisingly, despite the variance in sizes everything worked out.
At the end of the night ... we had a lot of fun and every girl walked away with new (free!) clothes. The only failure: I didn't end up scaling down my wardrobe as much as I had hoped :) I can never pass up new clothes!
Thursday, 14 March 2013
make-ahead smoothies
One of my goals over March Break was to make some healthy, freeze-able food. When I'm teaching and Isaac is working and going to school, our diet quickly slides into a routine of perogies, frozen pizzas and pasta (and grill 'ems ... mmm ...)
Since I am chronically running late every morning (not being late -- running late -- there's a difference) I was inspired to make some make-ahead breakfast smoothies. My main source of inspiration (besides what I had in the freezer): http://www.theyummylife.com/Oatmeal_Smoothies
Each of the six flavours of smoothies on this site include oats and chia seeds. Oats help make the smoothies a filling meal; chia seeds are, from what I understand, really good for you and they are thickeners. So if you usually rely on ice to thicken your smoothies (like I do) and hate it when they get warm and runny, this will solve that problem.
 The author suggests to grind up a large batch of the oat/chia seed mix. Put both ingredients in the blender according to the ratios given and grind them up until you have a flour-like consistency. Then for every smoothie you want to make (a "batch" only makes one pint jar) add 1/4 cup of the oat/chia mix. (This is the same ratio she uses for her Fro-Yo pops -- haven't tried those yet.) I now have a jar of leftover oat/chia mix for the next time I make smoothies.
For each smoothie recipe I used honey as the sweetener. Because I lovelovelove honey.
 For each smoothie I used Greek yogurt because a) it's thicker b) it has more protein and I plan on these smoothies being breakfast and c) there were some 50% off containers at the grocery store.

Based on my tastes and what I had in my fridge, I chose these four flavours to try:
1. Apricot Orange Oatmeal Smoothie (3 jars -- batch doubled, stuff added)
This was my least favourite. I didn't like the tiny bits of dried apricot (to be fair, she did warn me) and the flavour was off to me. I ended up adding lots of honey and some regular yogurt because the taste was so tart. I also spilled a bit more almond extract than it called for, so that needed to be watered down with regular yogurt, too :) To be honest I would not make this recipe again.
2. Apple Peanut Butter Cinnamon Oatmeal Smoothie (2.5 jars -- batch doubled)
This. was. amazing. I doubled the batch and it gave me 2.5 jars ... excellent, because I couldn't wait to eat some. I couldn't stop "tasting" it. I was a little surprised because I'm not normally a big peanut butter fan, but this is delicious! It's also the easiest to throw together because the fruit in it is simply unsweetened apple sauce. I'm definitely going to make this one again and again -- it was my favourite.
3. Strawberry Banana Oatmeal Smoothie (3 jars -- doubled the batch)
Shocker -- this one was good, too. Pretty classic. Unfortunately my stomach doesn't like raw banana so these are for Isaac. I used two frozen bananas I had in the freezer. Last summer I also crushed some extra strawberries into a sauce and poured it into an ice cube tray, then put the cubes in a freezer bag -- I used the strawberry ice cubes and a little less liquid.
4. Pomegranate Blueberry Oatmeal Smoothie (6 jars -- multiplied the batch by five!)
I had a freezer bag of wild blackberries, so I used them up for this smoothie in place of blueberries (I don't really like blueberries, anyway). The blackberries are tart so I had to add a good amount of honey. This smoothie is good -- what you'd expect from a homemade smoothie. Good, good for you, a little bland ... The blackberries also have a zillion seeds which are a little annoying. But -- good smoothie.
Total number of jars: 14.5!
After having the jars sit in the fridge overnight, they will be stacked neatly into our freezer for breakfast next week :)
Since I am chronically running late every morning (not being late -- running late -- there's a difference) I was inspired to make some make-ahead breakfast smoothies. My main source of inspiration (besides what I had in the freezer): http://www.theyummylife.com/Oatmeal_Smoothies
Each of the six flavours of smoothies on this site include oats and chia seeds. Oats help make the smoothies a filling meal; chia seeds are, from what I understand, really good for you and they are thickeners. So if you usually rely on ice to thicken your smoothies (like I do) and hate it when they get warm and runny, this will solve that problem.
 The author suggests to grind up a large batch of the oat/chia seed mix. Put both ingredients in the blender according to the ratios given and grind them up until you have a flour-like consistency. Then for every smoothie you want to make (a "batch" only makes one pint jar) add 1/4 cup of the oat/chia mix. (This is the same ratio she uses for her Fro-Yo pops -- haven't tried those yet.) I now have a jar of leftover oat/chia mix for the next time I make smoothies.
For each smoothie recipe I used honey as the sweetener. Because I lovelovelove honey.
 For each smoothie I used Greek yogurt because a) it's thicker b) it has more protein and I plan on these smoothies being breakfast and c) there were some 50% off containers at the grocery store.
Based on my tastes and what I had in my fridge, I chose these four flavours to try:
1. Apricot Orange Oatmeal Smoothie (3 jars -- batch doubled, stuff added)
This was my least favourite. I didn't like the tiny bits of dried apricot (to be fair, she did warn me) and the flavour was off to me. I ended up adding lots of honey and some regular yogurt because the taste was so tart. I also spilled a bit more almond extract than it called for, so that needed to be watered down with regular yogurt, too :) To be honest I would not make this recipe again.
2. Apple Peanut Butter Cinnamon Oatmeal Smoothie (2.5 jars -- batch doubled)
This. was. amazing. I doubled the batch and it gave me 2.5 jars ... excellent, because I couldn't wait to eat some. I couldn't stop "tasting" it. I was a little surprised because I'm not normally a big peanut butter fan, but this is delicious! It's also the easiest to throw together because the fruit in it is simply unsweetened apple sauce. I'm definitely going to make this one again and again -- it was my favourite.
3. Strawberry Banana Oatmeal Smoothie (3 jars -- doubled the batch)
Shocker -- this one was good, too. Pretty classic. Unfortunately my stomach doesn't like raw banana so these are for Isaac. I used two frozen bananas I had in the freezer. Last summer I also crushed some extra strawberries into a sauce and poured it into an ice cube tray, then put the cubes in a freezer bag -- I used the strawberry ice cubes and a little less liquid.
4. Pomegranate Blueberry Oatmeal Smoothie (6 jars -- multiplied the batch by five!)
I had a freezer bag of wild blackberries, so I used them up for this smoothie in place of blueberries (I don't really like blueberries, anyway). The blackberries are tart so I had to add a good amount of honey. This smoothie is good -- what you'd expect from a homemade smoothie. Good, good for you, a little bland ... The blackberries also have a zillion seeds which are a little annoying. But -- good smoothie.
Total number of jars: 14.5!
After having the jars sit in the fridge overnight, they will be stacked neatly into our freezer for breakfast next week :)
 |
| Top left: apricot orange, Top right and bottom right: strawberry banana Bottom left: blackberry pomegranate, Bottom centre: apple peanut butter cinnamon |
Sunday, 24 February 2013
7 money rules for life
 A summary of Mary Hunt's 7 Money Rules for Life. I picked this book up at the library, and it's one that I would like to have on my bookshelf one day. I was looking for some financial advice, and was happily surprised that Mary Hunt is also a devoted Christian and shares many of our values. As someone who found herself in $100,000 of toxic consumer debt and painfully fought her way out, Hunt's approach is not judgmental and it is realistic. I recommend you reading it, but if you don't have time here's a brief summary and some quotable quotes:
Why does money matter?
- Money is important, with emotional, spiritual and personal impacts.
- Money impacts our lives -- where we live, how we live, where kids go to school, how we pay our bills, how we prepare for the future.
- We are living in a financially uncertain time.
- You might need a handle a significant amount of money in the future -- an inheritance, promotion, or investment. (I'll be happy if this one happens!)
The money rules are just that: rules. They are principles to guide you, no matter how much or how little you make.
The Rules:
- Spend less than you earn. You've probably heard this principle before. In order to fulfill this, examine your attitude. Examine how much our culture of entitlement has influenced you. When I read this, I was convicted of my own sense of entitlement. I believe that I deserve vacations, meals out, and things that I like even if I can't afford it. Spending less than you earn sounds impossible to those living paycheque to paycheque, but it's key to the other six rules. To be able to live below your means, you need to honestly examine needs versus wants.
- "Contrary to how it might sound to you at first, Rule 1 isn't about restriction. It's about freedom -- freedom from want, freedom from fear of running out of money, freedom from reliance on credit, freedom from being under the economic thumb of others." (40)
- 11 ways to widen the gap between your earning and your spending: borrow and share, avoid the mall, limit exposure to ads, live with cash, designate one day of the week as a "spend-free day", save the difference, eat in, pare down/sell used items, unfriend the Joneses, and take opportunities to increase your income.
- Save for the future. Start putting away ten percent of what you earn into a separate savings account. This is not your retirement savings. This is not your savings for new furniture or a vacation. This is your emergency fund. Hunt recommends saving 6 months of living expenses. This is important because it frees you from fear. If anything happens (job loss, medical problem) you have a cushion that will allow you to stay level-headed and make the best choices (ex: not just taking the first job you can get because you need to get back to work). Emergencies and life changes will come up; when they do, will you rely on your own savings or on credit?
- Give some away. Find something you believe in and trust and give money to it. Instead of choosing a set amount, a percentage is a better idea because it will adjust with your income. While the percentage you choose is a personal decision, Hunt recommends a 10-10-80 rule: save 10%, give 10% and spend 80%.
- "Giving is the way to break the grip of greed so that contentment can thrive. Giving brings balance to your life . . . Giving is the way that you express how grateful you are for all that you have." (85)
- Anticipate your irregular expenses. When most people sit down and calculate their monthly expenses compared to their income, they realize that on paper they are spending less than they earn. So where does the rest of the money go? Irregular expenses. Hunt suggests sitting down and making a list of the irregular expenses you had last year and their approximate cost -- a vacation, an appliance, a car repair, Christmas spending, etc. Total that number. Now divide it by 12. That's your new fixed monthly expense to deposit into an irregular expenses account.
- Tell your money where to go. This chapter is all about budgets and tracking your spending. I'm going to confess that I kind of skim over this because as students we don't have regular monthly income and we basically try to cheap out on everything. It has been helpful for us to track our expenses every so often just to see if everything is out of whack. A great tool to help budget is an online program called Mvelopes -- we know couples who claim that Mvelopes changed their lives.
- Manage your credit. Instead of advising you to cut up all your credit cards, Hunt admits this is not realistic. Credit is a part of our world, probably a part of your financial situation, and your credit rating "plays a very important role in your financial health."
- You are entitled to one free credit report every 12 months (not sure if this is different for us Canadians). Make use of that to track your credit report. These reports are often full of errors, so track any inaccuracies and get them changed.
- How to improve your credit rating: pay your bills on time, all the time. At a minimum, use one credit card several times a year and immediately pay it back down to a $0 balance. Lower your utilization rate (the amount of money you use compared to how much is available to you). Refrain from closing accounts or opening new accounts. (??)
- Borrow only what you know you can repay. Again, Hunt admits that borrowing money -- mortgages, student loans, financing a car -- is an important part of life. It is not the enemy. "Here's the bottom line: debt is not a good thing, and it is to be avoided whenever possible. When it cannot be avoided, debt should be entered into advisedly, with tremendous caution and a strong system of safety nets in place."
- Debt falls into three categories:
- Reasonable, or good debt: borrowing money to buy something that has a high likelihood of increasing in value. This can be a mortgage, a small amount of student debt, etc.
- Toxic debt: includes credit card debt, payday loans, and other high- or variable-rate borrowing. This kind of debt should be avoided entirely.
- Neutral debt.
- Remember that the lender will often want you to borrow more and pay it back slowly. Don't let the lender determine how much you will borrow and how you will pay it off.
- Home mortgages/home equity .... skipped over this ... :)
- Student debt: Hunt puts this in the "neutral" category. It can be reasonable or it can be toxic. STUDENT DEBT IS NOT AUTOMATICALLY GOOD DEBT. Especially with the economy and job opportunities available today. Thousands of people are drowning in student debt and are moving back in with Mom and Dad after graduation.
- Your total student debt should not exceed the average first year entry level salary in the industry for which you are preparing. This way, your goal can be to pay back your student debt within the first three years after graduation. (If you're not preparing for an industry and just want to learn -- fund it yourself, don't go into debt.)
- Some Scripture about debt: "The wicked borrow and do not repay, but the righteous give generously." Debt as bondage: "The rich rule over the poor, and the borrower is servant to the lender."
Break down each rule and figure out a step that you can start doing today. Write down your goals, and be specific.
For those with irregular income, she has a whole chapter devoted to you :) I appreciated this because I often feel like financial advice is targeted at people with a regular paycheque.
If you are drowning in debt, she has a whole chapter for you, too :)
Quotable quotes:
"I am so grateful for how God has taken the broken pieces of my life and woven them into a tapestry of beauty that reflects his grace and mercy." (32)
"Advertisers rely on marketing theory that says people are driven by four things: fear, guilt, greed, and the need for approval. Ads are designed to throw us off balance emotionally to create discontent." (52)
"If you've ever felt as though some kind of invisible force is conspiring against you to make sure you never get ahead, you may be more right than you think. You have two enemies with a single purpose: to destroy your contentment and make it difficult, if not impossible, to spend less than you earn. Their names are Fear and Greed." (63)
"Today, there are three kinds of people: the have's, the have-not's, and the have-not-paid-for-what-they-have's." -- Earl Wilson (165)
"Today, there are three kinds of people: the have's, the have-not's, and the have-not-paid-for-what-they-have's." -- Earl Wilson (165)
Monday, 7 January 2013
new soup
 I am a soup fiend. I love making and eating good soup. As winter fully buries us, I am bummed that my immersion blender is broken (what did I expect? I got it for $3 at a garage sale!) and am on the lookout for a new one.
Isaac and I are both so busy right now -- he's holding down two part time jobs and is a full-time student, while I'm student teaching full-time and working part-time. I hate it when we're both busy and we end up eating junk, so on Sunday I went to the Halifax Farmer's Market and purchased two frozen homemade soups.
We had the seafood chowder last night, and today I am trying the other flavour: beet parsnip pear soup! A different combo to be sure, but the vendor told me that it's one of her most popular soups -- people come back for it week after week.
Now I'm sitting here eating the beet-parsnip-pear concoction, and it's good! I'm going to have to find a recipe, because I'm curious to try to make it myself. It probably wouldn't be soup that I'd make often, but it's a different flavour to have once in awhile.
Some of my other favourite soups to make/freeze/eat:
- Carrot ginger soup (sooo cheap to make!)
- Butternut squash soup
- Cream of broccoli with cheddar
- Good old chicken or turkey noodle soup
- Chili
I pinned a recipe on Pinterest for a cauliflower soup, and I also need to try to make borscht ... maybe the same day I attempt beet parsnip pear soup :)
Thursday, 3 January 2013
winter wonderland bridal shower: pinterest-style
I discovered Pinterest. I'm a little behind, I realize, but when I saw how addicted other people became I was a little wary of jumping in. I thought my sister Sonja's Winter Wonderland themed bridal shower would be a good excuse to introduce myself to Pinterest.
I am now hooked on Pinterest. I have quote boards, recipe boards, DIY boards, teaching boards, etc.
Sonja's shower was a success, and a I have to admit that most of the creative details we stole from Pinterest :) My oldest sister Kristel, the fashionista fresh from California, was the one who had the idea to have a Winter Wonderland theme. In the process of organizing (controlling?) and home-for-Christmas-busyness I only had one meltdown: I threw myself on my bed and sobbed like a baby when I saw that my younger sister had taken the liberty of setting up my note tree. My husband, poor man who grew up with mostly brothers, tried to rub my back while I blubbered at him to "leave me alone!" It was a pretty embarrassing relapse back to age eleven, but I figure that one meltdown over the whole Christmas season is okay! :)
Some Pinterest-inspired highlights:

- Mason jars + Epsom salts + tea lights = cheap, wintry candles
 - Tissue paper balls from Pinterest! So easy! All I used was eight sheets of tissue paper (for each ball), gift ribbon, scissors and a bit of tape. All you do is fold the stack of tissue paper accordian-style (1-1 and a half inch), tie the middle with ribbon (leave some length to hang the tissue paper ball by), secure the ribbon with a bit of tape, cut the edges sharply or curved (I did a mix), and then separate layer by layer. They're light, cheap, and they don't droop after a few days like balloons! :) Find the full tutorial on my Pinterest board under Special Occassions! My mother, who would be the first one to tell you that she is not crafty, successfully made several of these into a beautiful piece to hang in the kitchen.


- A hot chocolate bar. The women and the kids in attendance loved this! I borrowed a perk from my super-hostess mother-in-law and filled jars with different toppings from the Bulk Barn. We got Skor bits, marshmallows, candy canes, chocolate sprinkles, cookie straws, blue sprinkles and whipped cream for toppings.
- Cake pops! These turned out really well. I was so focused on how they looked that I began to worry about how they would taste -- but they were delicious! I used two double chocolate cake mixes. I baked the cakes and after they cooled I crumbled them finely in a bowl, one at a time. Because the cake mixes were so moist, I only used about two heaping tablespoons of icing (pre-made) for each cake mix. This was enough to roll the mix into balls. I then dipped the cake pop sticks into melted white chocolate and stuck them into the balls (so that the melted chocolate would hold the cake onto the sticks). I stuck these in the freezer for 15-20 minutes. Then I took them out and dipped each cake pop into the melted white chocolate (with a touch of lard added) and sprinkled them with blue sparkles. I didn't think ahead enough to have something for the pops to stand in while they hardened, so I had to do a few at a time and balance them in mason jars so they wouldn't touch each other while they hardened. Even though the chocolate hardened quickly, I got impatient with this process so for the second batch I simple dipped them in white chocolate, stuck them upside-down in some pretty mini-cupcake liners, and sprinkled with the blue sugar. By the time I finished both cake mixes I got about 60 pops.
- A note tree. In each wintry invitation, guests recieved two recipe cards. One card was for them to write down their favourite recipe for the bride-to-be, and the other was to write down a piece of advice, a favourite Scripture, or a good quote. To display the pieces of advice/Scripture/quotes we set up a little note tree using a branch I had taken from the side of the road. My younger sister sprayed it with fake snow, which looked very good, I must say! We had extra pens and pieces of paper set out, as well as a jar of pre-cut ribbon. It was a really great way for people to share some wisdom with my sister as well as the other guests.

- This last idea was not from Pinterest. Using my mother's childhood wagon, we set up a wintry display. White lights under tissue paper, skates, snowflakes, jars of pine cones and a little Christmas tree ended up on the wagon. My mom was so pleased with it because the wagon had special sentimental value for her.
- This idea was also not from Pinterest: a gift toboggan! Using a toboggan for the gifts was a fun way to incorporate the Winter Wonderland theme.
Kudos to my mom and sisters on throwing a beautiful shower, thanks to all the generous guests who made the effort to come to a shower only days before Christmas, and congratulations to Sonja! Oh, and thanks to all the people out there who freely share ideas on Pinterest!
I am now hooked on Pinterest. I have quote boards, recipe boards, DIY boards, teaching boards, etc.
Sonja's shower was a success, and a I have to admit that most of the creative details we stole from Pinterest :) My oldest sister Kristel, the fashionista fresh from California, was the one who had the idea to have a Winter Wonderland theme. In the process of organizing (controlling?) and home-for-Christmas-busyness I only had one meltdown: I threw myself on my bed and sobbed like a baby when I saw that my younger sister had taken the liberty of setting up my note tree. My husband, poor man who grew up with mostly brothers, tried to rub my back while I blubbered at him to "leave me alone!" It was a pretty embarrassing relapse back to age eleven, but I figure that one meltdown over the whole Christmas season is okay! :)
Some Pinterest-inspired highlights:

- Mason jars + Epsom salts + tea lights = cheap, wintry candles
 - Tissue paper balls from Pinterest! So easy! All I used was eight sheets of tissue paper (for each ball), gift ribbon, scissors and a bit of tape. All you do is fold the stack of tissue paper accordian-style (1-1 and a half inch), tie the middle with ribbon (leave some length to hang the tissue paper ball by), secure the ribbon with a bit of tape, cut the edges sharply or curved (I did a mix), and then separate layer by layer. They're light, cheap, and they don't droop after a few days like balloons! :) Find the full tutorial on my Pinterest board under Special Occassions! My mother, who would be the first one to tell you that she is not crafty, successfully made several of these into a beautiful piece to hang in the kitchen.

- A hot chocolate bar. The women and the kids in attendance loved this! I borrowed a perk from my super-hostess mother-in-law and filled jars with different toppings from the Bulk Barn. We got Skor bits, marshmallows, candy canes, chocolate sprinkles, cookie straws, blue sprinkles and whipped cream for toppings.
 |
| cake pops |
 |
| the note tree |
- A note tree. In each wintry invitation, guests recieved two recipe cards. One card was for them to write down their favourite recipe for the bride-to-be, and the other was to write down a piece of advice, a favourite Scripture, or a good quote. To display the pieces of advice/Scripture/quotes we set up a little note tree using a branch I had taken from the side of the road. My younger sister sprayed it with fake snow, which looked very good, I must say! We had extra pens and pieces of paper set out, as well as a jar of pre-cut ribbon. It was a really great way for people to share some wisdom with my sister as well as the other guests.

- This last idea was not from Pinterest. Using my mother's childhood wagon, we set up a wintry display. White lights under tissue paper, skates, snowflakes, jars of pine cones and a little Christmas tree ended up on the wagon. My mom was so pleased with it because the wagon had special sentimental value for her.
 |
| gift toboggan |
- This idea was also not from Pinterest: a gift toboggan! Using a toboggan for the gifts was a fun way to incorporate the Winter Wonderland theme.
 |
| had to include a picture of mom's chocolate-covered strawberries! |
Tuesday, 4 December 2012
DIY hair clip holder
What do you make for a family with three little girls? They already have an abundance of books, toys, clothes, and hair clips. Something to organize their little girl things, that's what!

I made this hair clip holder for my nieces. Because I had extra material around the apartment, I only had to buy a funky frame ($2 at a garage sale) and some pretty ribbon. I designed it to (hopefully) match the colours of their home.
Step 1. Get a cool frame and remove the glass.
Step 2. Choose a piece of fabric and staple it to the cardboard in the picture frame.
Step 3. Choose some matching ribbon and staple a few strips vertically over the fabric (staple only on the back of the cardboard).
Step 4. Put the cardboard back in the frame, fabric side facing out.
Step 5. Voila! Add some hair clips for a unique, economical, and practical gift!
I hope they like it!

I made this hair clip holder for my nieces. Because I had extra material around the apartment, I only had to buy a funky frame ($2 at a garage sale) and some pretty ribbon. I designed it to (hopefully) match the colours of their home.
Step 1. Get a cool frame and remove the glass.
Step 2. Choose a piece of fabric and staple it to the cardboard in the picture frame.
Step 3. Choose some matching ribbon and staple a few strips vertically over the fabric (staple only on the back of the cardboard).
Step 4. Put the cardboard back in the frame, fabric side facing out.
Step 5. Voila! Add some hair clips for a unique, economical, and practical gift!
I hope they like it!
white crayon and watercolours
This is a little art project simple enough for me to do! I got the original idea off of Pinterest and tweaked it a little.
Step 1. Choose a quote.
Step 2. Type out, style and print the quote on a piece of computer paper.
Step 3. Tape the computer paper to a window.
Step 4. Tape another piece of white paper on top of it.
Step 5. Using a white crayon, trace the words onto the fresh piece of paper. Make sure you get a good layer of white crayon.
Step 6. Streak it with watercolours of your choice -- the words will magically appear!
Step 7. Let dry.
Step 8. Put it in a frame (in my case, from the dollar store!)
Step 9. Hang it, to your husband's chagrin.
A pretty nice little piece of art for only a few dollars! I love words, so I take any chance I can get to display a good quote!
 |
| ignore the awful glare! |
Canning 2012
This was our first year making our own preserves. Isaac and I are both students with many siblings. As an affordable gift that will hopefully still be appreciated, we decided to give preserves for Christmas this year.
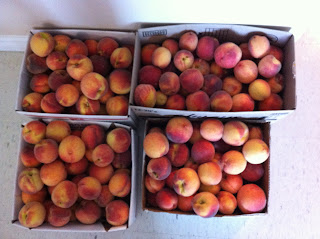
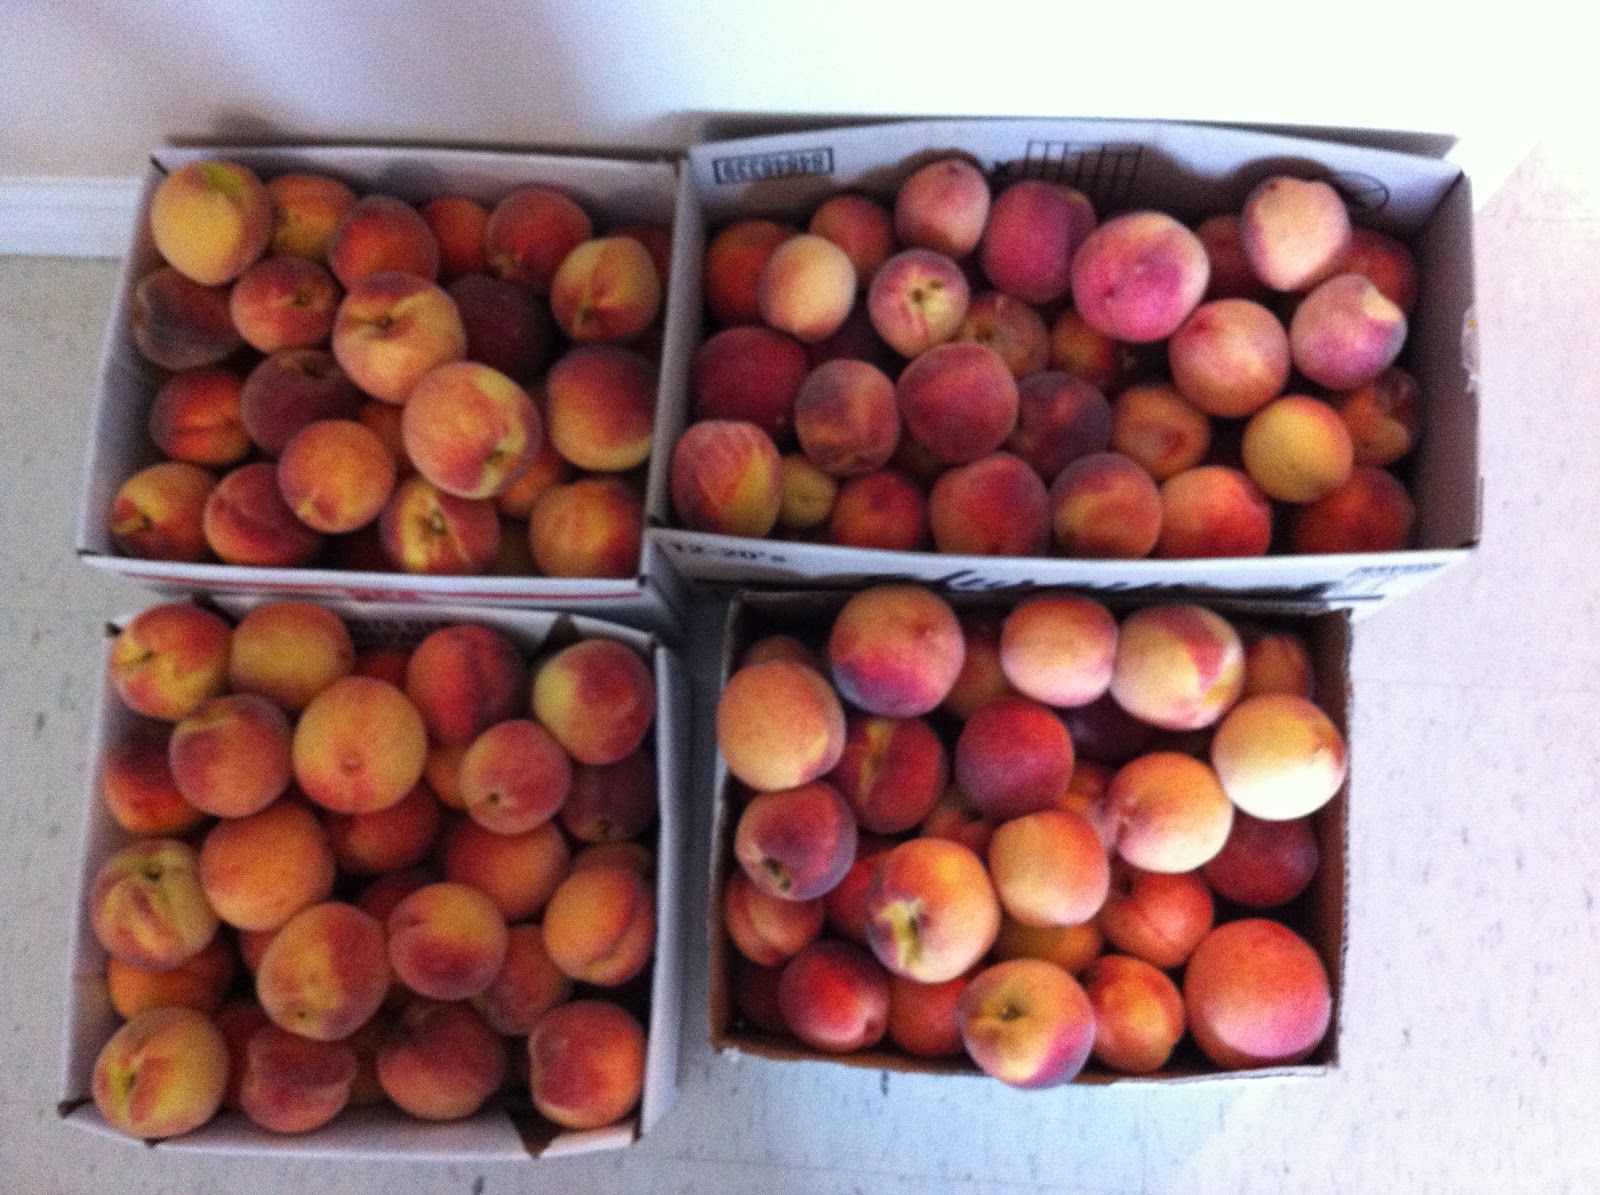
 We spent summer and fall driving to u-picks in the Annapolis Valley, hunting down deals at farmer's markets, picking peaches from a friend's backyard, and hiking to pick wild blackberries, raspberries, and cranberries. We spent hours of quality time together pitting, peeling and processing. The result: a full, beautiful pantry of our own preserves.
We had a few bumps along the way, of course. Since our first batch of jam turned out a little runny, I decided to err on the side of caution on the next batch. I managed to burn a pot of raspberry jam. I realized something was wrong when I poured the jam into a jar and, as it cooled, it transformed into a candy-like consistency. I couldn't even save the jar -- it had to be thrown away! Now I see why the recipes insist on small batches ... at least I didn't waste all our berries!
Ever-frugal, I kept track of all of our canning costs. The results:
Start-up costs/re-usable:
This includes a funnel, a ladle, a hot water bath canner, a jar lifter, and lots of jars (from thrift stores, garage sales, etc)
Total: $53.87
 Costs for 2012:
This includes jars that will be used for gifts (I got 48 pretty little jars with one-piece lids for $20 off Kijiji!), ingredients for the jam (pectin, lemon juice, berries, etc), and jar lids that cannot be re-used. (Please note: I kept a detailed list of all costs, include a 14 cent jalepano pepper!)
Total: $202.45
Total of Start-Up and Consumed Costs: $256.32
Types of Preserves Made:
Raspberry jam
Strawberry jam (used a recipe with less sugar -- even though it made less jam, the jam was a beautiful ruby red and bursting with berry flavour!)
Blackberry-Raspberry jam
Peach jelly (made from the peach juice strained from peach pits and peelings -- love being frugal!)
Apple Almond Earl Grey jelly (delicious, delicate flavour!)
Marmalade
Cranberry sauce
Strawberry sauce
Spiced Blackberry sauce (aka runny Spiced Blackberry jam!)
German cabbage (red cabbage with seasonings -- these didn't turn out so well, the spices were too strong)
Spiced Blackberry jam (although the recipe with nutmeg was yummy, the spices were a bit overpowering)
Canned peaches
Canned pears
Red pepper jelly (sooo yummy! We go through this very quickly! The recipe is easy, fun to make, and I prefer mine on the sweet side! It's very nice on sandwiches and on crackers with goat cheese!)
Tomato sauce (I have to admit I was a little disappointed at how much 10lbs of field tomatoes boils down! But the sauce was delicious)

Jars Made
250 mL jars: 20
190 mL jars: 20
pints: 27
quarts: 20
1/2 pint: 7
plus about two ice cube trays of frozen strawberry sauce (to be put in a freezer bag for smoothies!)
Total number of jars: 94
Including start-up costs, each jar only cost me an average of: $2.73
Not including start-up costs (which will be re-used year after year), each jar only cost an average of: $2.15
Even for my first year of canning, I must say that's a pretty good deal! Especially considering the number of gift jars I have (40). Even if I give each person 3-4 jars in a little basket (baskets from Value Village), each gift still comes in at under $10.
 There's nothing quite as beautiful as the sight of a pantry full of different coloured, different shaped jars... I'm pretty proud of what we accomplished this year!
 We spent summer and fall driving to u-picks in the Annapolis Valley, hunting down deals at farmer's markets, picking peaches from a friend's backyard, and hiking to pick wild blackberries, raspberries, and cranberries. We spent hours of quality time together pitting, peeling and processing. The result: a full, beautiful pantry of our own preserves.
 We had a few bumps along the way, of course. Since our first batch of jam turned out a little runny, I decided to err on the side of caution on the next batch. I managed to burn a pot of raspberry jam. I realized something was wrong when I poured the jam into a jar and, as it cooled, it transformed into a candy-like consistency. I couldn't even save the jar -- it had to be thrown away! Now I see why the recipes insist on small batches ... at least I didn't waste all our berries!
Ever-frugal, I kept track of all of our canning costs. The results:
Start-up costs/re-usable:
This includes a funnel, a ladle, a hot water bath canner, a jar lifter, and lots of jars (from thrift stores, garage sales, etc)
Total: $53.87
 Costs for 2012:
 This includes jars that will be used for gifts (I got 48 pretty little jars with one-piece lids for $20 off Kijiji!), ingredients for the jam (pectin, lemon juice, berries, etc), and jar lids that cannot be re-used. (Please note: I kept a detailed list of all costs, include a 14 cent jalepano pepper!)
Total: $202.45
Total of Start-Up and Consumed Costs: $256.32
Types of Preserves Made:
Raspberry jam
Strawberry jam (used a recipe with less sugar -- even though it made less jam, the jam was a beautiful ruby red and bursting with berry flavour!)
Blackberry-Raspberry jam
Peach jelly (made from the peach juice strained from peach pits and peelings -- love being frugal!)
Apple Almond Earl Grey jelly (delicious, delicate flavour!)
Marmalade
Cranberry sauce
Strawberry sauce
Spiced Blackberry sauce (aka runny Spiced Blackberry jam!)
German cabbage (red cabbage with seasonings -- these didn't turn out so well, the spices were too strong)
Spiced Blackberry jam (although the recipe with nutmeg was yummy, the spices were a bit overpowering)
Canned peaches
Canned pears
Red pepper jelly (sooo yummy! We go through this very quickly! The recipe is easy, fun to make, and I prefer mine on the sweet side! It's very nice on sandwiches and on crackers with goat cheese!)
Tomato sauce (I have to admit I was a little disappointed at how much 10lbs of field tomatoes boils down! But the sauce was delicious)

Jars Made
250 mL jars: 20
190 mL jars: 20
pints: 27
quarts: 20
1/2 pint: 7
plus about two ice cube trays of frozen strawberry sauce (to be put in a freezer bag for smoothies!)
Total number of jars: 94
Including start-up costs, each jar only cost me an average of: $2.73
Not including start-up costs (which will be re-used year after year), each jar only cost an average of: $2.15
Even for my first year of canning, I must say that's a pretty good deal! Especially considering the number of gift jars I have (40). Even if I give each person 3-4 jars in a little basket (baskets from Value Village), each gift still comes in at under $10.

Subscribe to:
Posts (Atom)